MY SITE
Home
About
RCHS
Orientation to Technology
STEM 1
Contact
This is me making a mark 3 inches from the end of my neck so when I put it on the router I won't cut past that point.
This is me making marks so I know where to drill.
This is me marking so I know the exact spot to drill.
This is me drilling so my fretboard would stay together with my headstock board.
This is me drilling so my fretboard would stay together with my headstock board.
This is me clamping my board so it will stay in place so I can drill.
This is me sanding my board so I can make it flat and smooth.
This is me sanding down my fretboard to make it flat and smooth.
This is me using a bandsaw to cut off pieces of my board.
This is me using the router to make this neck of my board round and not square.
This is the design I made on AutoCAD for my headstock design.
This is me using the router to make the shape of my headstock.
This is me sanding the top of my neck to get the burns away and make it smooth.
This is me sanding my side of the top of my neck to make it even.
This is my board before filing to make a resemblance and so I know what to file off
This is me using a file to make my neck rounded and even.
This is me drilling holes in the top for the tuners.
This is me using a orbital sander to make my neck smooth.
This is me sanding to make it smooth.
This is me clamping my back side of my guitar so the glue sticks.
This is me trimming the side of me neck so it is nice and smooth.
This is my image in carveco
This is my image brought into AutoCAD
This is me sanding the top of my guitar so the strip I put in is flat.
This is me routing my edge of my guitar so I can put a piece of edging in and glue it in.
This is me sanding the side took make it smooth.
This is me sanding the lip to make it round so it isn't a point anymore.
This is me drilling holes into the handle we are about to install to our body for spraying.
This is my body and the handle after its been installed for the first coat of finish.
This is me clamping my last fret into my fret board.
This is me drilling holes into my neck so the neck will be secured into my body of my guitar.
This is me sanding all the bumps off from the finish.
This is me waiting for the 2nd coat of finish to dry.
This is what the front of my guitar looks like after 2 coats of finish.
This is what the back of my guitar looks like after 2 coats of finish.
This is me scoring my body to put the bridge in.
This is my body while gluing the bridge on.
This is me tightening the tuners so they are gonna stay in place.
This is me screwing my neck to my bridge.
This is me Drilling my button for a sling on.
This is me oiling my neck.
This is me tuning my guitar.
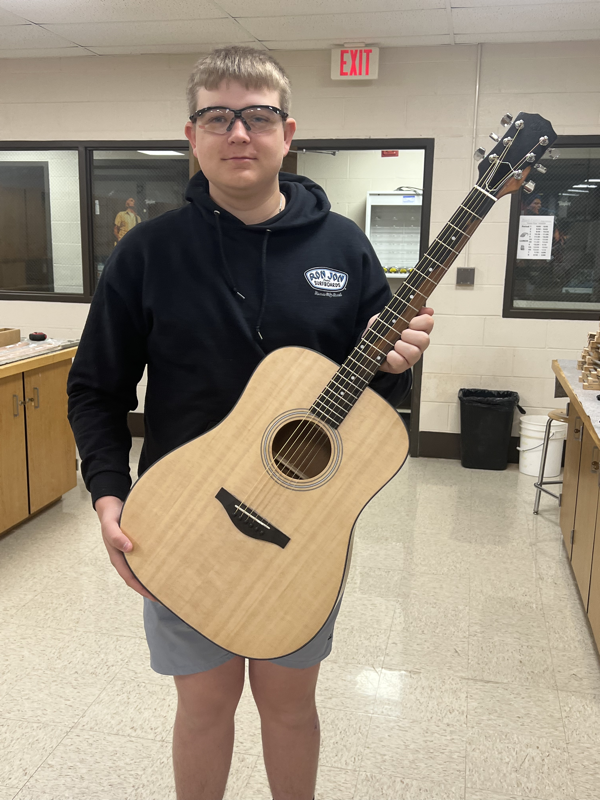
This is me with my finished guitar.
Home
About
RCHS
Orientation to Technology
STEM 1
Contact